
If you’ve ever stared into your fridge at lunchtime wondering what on earth to throw together that’s quick, filling, and not just another sad sandwich—well, friend, this one’s for you. Turkey Cheddar Lunch Roll Ups are my go-to lifesavers. They’re fresh, portable, and make me feel just a little more put-together (even on those days when my hair is in a messy bun and I’m living on iced coffee).
Think of these roll ups as the “grown-up” version of the lunchbox pinwheels we all loved as kids—but with better flavor, fresher veggies, and that little hit of cheddar that makes everything feel right with the world.
Table of Contents
Why You’ll Love These Turkey Cheddar Lunch Roll Ups
- Quick & fuss-free – Ready in under 10 minutes.
- Kid-approved – Picky eaters tend to munch these right up.
- Healthy-ish – Protein from turkey, fiber from veggies, and cheesy comfort too.
- Perfect on-the-go – Lunchboxes, road trips, or even as a light dinner when cooking feels like a chore.
And hey, if you love easy handheld snacks, you might also enjoy my Peanut Butter Banana Roll Ups—another fun twist on lunch!
What Do Turkey Cheddar Lunch Roll Ups Taste Like?
Imagine this: soft tortilla, creamy spread, savory turkey, sharp cheddar, and crisp veggies all rolled up into bite-sized happiness. They’re fresh and crunchy, but with enough cheesiness to keep everyone satisfied. Honestly? It’s like a mini sandwich party in every bite.
Ingredients You’ll Need for Turkey Cheddar Lunch Roll Ups
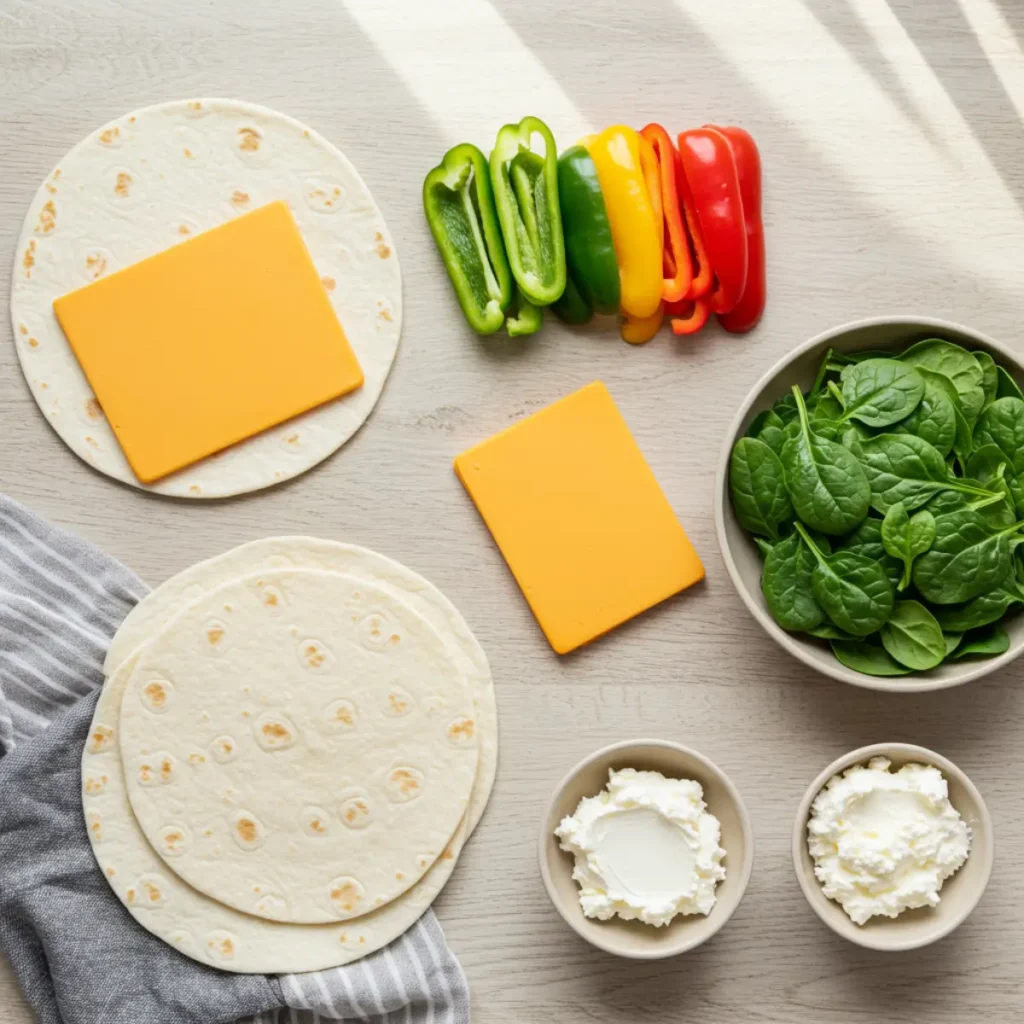
When it comes to making these Turkey Cheddar Lunch Roll Ups, the beauty is in their simplicity. Each ingredient plays a role in flavor and texture, so you’ll want to choose good-quality items. Here’s a breakdown to help you shop and prep with confidence:
- 4 large tortilla wraps – You can use whole wheat for a heartier bite, or go with regular flour tortillas if that’s what you have on hand. I’ve even tried spinach wraps for extra color, and they work beautifully. Soft, pliable tortillas are key here, because no one wants roll ups that crack when you slice them.
- 8 slices of deli turkey – Pick a nice lean turkey, whether it’s oven-roasted, smoked, or honey-flavored. Thinly sliced deli meat rolls tightly without tearing the tortilla, which makes for prettier pinwheels. (Pro tip: ask the deli counter to slice it thin if you’re grabbing it fresh.)
- 4 slices of cheddar cheese – Cheddar gives that bold, slightly sharp flavor that balances the creaminess of the spread. If you’re a cheese lover, you could even use two slices per roll up, but one keeps it lighter.
- 1 cup of spinach or mixed greens – Fresh leafy greens add crunch and color. Spinach is tender and mild, while mixed greens give a bit of variety. Don’t be afraid to pile them on—this is where the healthy part sneaks in!
- ½ cup of sliced bell peppers – Red, yellow, orange, or green—pick your favorite. Bell peppers add a pop of sweetness and crunch that makes these roll ups extra satisfying.
- ¼ cup of cream cheese (or hummus) – This is your “glue.” Cream cheese makes things rich and smooth, while hummus gives you a lighter, plant-based option with a little extra flavor. Both spread easily and help everything stick together as you roll.
- Salt and pepper, to taste – Just a pinch goes a long way. These simple seasonings bring out the best in the turkey, cheese, and veggies.
- Optional add-ins – Thinly sliced cucumbers, a few olives, or even shredded carrots work well if you want more crunch or variety. I’ve even added apple slices before for a sweet-salty combo, and it was delicious!
The best part about these Turkey Cheddar Lunch Roll Ups is how flexible they are. Don’t be afraid to customize—if your kids prefer mild flavors, stick with turkey and cheese; if you’re making them for yourself, load them up with extra veggies for a more balanced meal.
For another fun, kid-friendly recipe that’s easy to whip up with just a few ingredients, you might also enjoy my Apple Fruit Donuts Recipe. Both are fresh, quick, and perfect for snacking or school lunches!
Step-by-Step Instructions for Turkey Cheddar Lunch Roll Ups
Making Turkey Cheddar Lunch Roll Ups is wonderfully simple, but sometimes the small details make all the difference. Below, I’ll walk you through each step so your roll ups come out fresh, neat, and picture-perfect every time.
1. Gather your ingredients
Start by setting out all of your ingredients on a clean cutting board or countertop. Having everything ready to go makes the process quick and stress-free. Lay out your tortillas, turkey slices, cheddar cheese, veggies, and your spread of choice (cream cheese or hummus).
Tip: If your tortillas feel stiff or cold, pop them in the microwave for 10–15 seconds. Warm tortillas are softer, which makes rolling much easier.
2. Spread your base layer
Take one tortilla wrap and spread a thin, even layer of cream cheese or hummus all over the surface. This creamy base acts like glue, holding everything together when you roll. Be sure to go right up to the edges, especially on the far side of the tortilla, so the roll seals nicely at the end.
3. Layer on the turkey
Now place 2 slices of deli turkey flat across the tortilla. Overlapping slightly helps cover the entire wrap, so every bite of your roll up has turkey in it. This step really gives your Turkey Cheddar Lunch Roll Ups that hearty, protein-packed bite.
4. Add the cheddar cheese
Next, lay one slice of cheddar cheese right in the center, on top of the turkey. The sharp cheddar flavor balances beautifully with the creamy spread and crunchy veggies. If you prefer, you can use shredded cheddar instead—it spreads out more evenly and makes slicing the roll ups easier.
5. Pile on the veggies
Here’s where the color and crunch come in! Add a handful of fresh spinach (or mixed greens) and scatter some sliced bell peppers over the cheese. The greens add freshness, while the peppers bring a pop of sweetness. If you’re making these for kids, you might want to go light on the veggies at first and slowly build up.
6. Season lightly
Sprinkle just a pinch of salt and freshly cracked black pepper. It may seem small, but this little step takes the flavor of your Turkey Cheddar Lunch Roll Ups up a notch.
7. Roll it up tightly
Starting from one edge, begin rolling the tortilla snugly, tucking in the filling as you go. Keep the roll tight but not so tight that the tortilla tears. That spread you added earlier will help “seal” the roll as you reach the end.
This part is just like rolling a burrito or cinnamon roll—you want it firm and compact so it slices beautifully.
8. Slice into pinwheels
Using a sharp serrated knife, cut the rolled tortilla into bite-sized slices, about 1 to 2 inches thick. A serrated knife works best because it cuts cleanly through the veggies without squishing everything out. Arrange the pinwheels cut-side up so all those pretty layers are visible.
9. Serve and enjoy
Arrange your slices on a serving platter and enjoy immediately. If you’re making them ahead, place them in an airtight container in the fridge. They’ll stay fresh for a couple of days, making them a great meal-prep option.
10. Repeat until all wraps are done
Keep going with the rest of your tortillas and ingredients until you’ve created a full batch of Turkey Cheddar Lunch Roll Ups.
And that’s it—step by step, you’ve just created a fun, colorful, and delicious lunch that’s perfect for kids, adults, or even a casual party appetizer.
If you love easy roll-up style recipes, you’ll probably also enjoy my Peanut Butter Banana Roll Ups. They’re a sweet twist on this idea and just as quick to make!
Tips & Tricks for Perfect Roll Ups
- Use room temperature tortillas—cold ones tend to crack.
- Want a little zing? Add a thin swipe of mustard or spicy mayo.
- If making ahead, wrap tightly in plastic wrap before slicing; this helps them hold shape.
- Cut with a sharp serrated knife so the veggies don’t squish out.
- Swap cheddar for pepper jack if you like a little heat.
Storage: Turkey Cheddar Lunch Roll Ups
- Store leftovers in an airtight container in the fridge for up to 2 days.
- Avoid freezing—tortillas and fresh veggies just don’t thaw well.
FAQs
Q: Can I make these the night before?
Yes! Just wrap tightly in plastic and slice right before serving.
Q: Can I use flavored wraps (spinach, tomato, etc.)?
Absolutely—they add color and fun!
Q: My kids don’t like peppers. What else works?
Cucumbers, shredded carrots, or even thin apple slices for crunch.
Conclusion
Whether you’re packing lunches, feeding a hungry crew, or just need a quick pick-me-up, Turkey Cheddar Lunch Roll Ups are a keeper. Fresh, filling, and ridiculously easy—you’ll find yourself making these on repeat.
If you try them, I’d love to hear! Leave a comment, snap a photo, or tag me on social media. And if you want more fun snack ideas, check out my Cinnamon Apple Cottage Cheese Bites.
Happy rolling, friends! 🥪💛
Follow us on Pinterest for weekly slow cooker inspiration, or join the conversation over on our Facebook page where fellow food lovers share their favorite comfort meals.
Print
Turkey Cheddar Lunch Roll Ups
- Total Time: 15 mins
- Yield: 32 pinwheels (4 wraps) 1x
Description
Easy, no-cook Turkey Cheddar Lunch Roll Ups made with soft tortillas, deli turkey, sharp cheddar, crisp veggies, and a creamy spread—perfect for meal prep, school lunches, or party pinwheels.
Ingredients
4 large tortilla wraps (whole wheat, flour, or spinach)
8 thin slices deli turkey (oven-roasted, smoked, or honey)
4 slices cheddar cheese (or 3/4 cup shredded)
1 cup baby spinach or mixed greens
1/2 cup thinly sliced bell peppers
1/4 cup cream cheese or hummus, softened
Salt and black pepper, to taste
Optional add-ins: thinly sliced cucumber, olives, shredded carrots, or thin apple slices
Instructions
1. Lay out tortillas, turkey, cheese, veggies, and spread on a clean work surface. Warm tortillas 10–15 seconds if stiff.
2. Spread a thin, even layer of cream cheese or hummus over each tortilla, going right to the edges.
3. Layer 2 slices of turkey across each tortilla, slightly overlapping for even coverage.
4. Place 1 slice cheddar (or sprinkle shredded cheddar) centered over the turkey.
5. Add a handful of spinach or mixed greens and scatter bell peppers evenly.
6. Season lightly with a pinch of salt and black pepper.
7. Starting from one edge, roll each tortilla up tightly, tucking the filling as you go so it’s compact.
8. Using a sharp serrated knife, slice into 1–2 inch pinwheels, turning the roll as needed for clean cuts.
9. Arrange cut-side up on a platter and serve immediately, or pack into containers for lunches.
10. Repeat with remaining tortillas and ingredients until all roll ups are made.
Notes
For the cleanest slices, chill the rolled tortillas 10–15 minutes before cutting.
Make it your way: swap cheddar for provolone or Swiss; add a swipe of mustard, pesto, or ranch under the cheese.
Use whole wheat or gluten-free tortillas as needed.
Meal prep: Store in an airtight container up to 2–3 days; place a paper towel in the container to absorb moisture.
Party tip: Insert toothpicks in the center of each pinwheel for easy serving.
- Prep Time: 15 mins
- Cook Time: 0 mins
- Category: Lunch
- Method: No-Cook
- Cuisine: American
Nutrition
- Serving Size: 4 pinwheels
- Calories: 220
- Sugar: 2g
- Sodium: 560mg
- Fat: 9g
- Saturated Fat: 4g
- Unsaturated Fat: 4g
- Trans Fat: 0g
- Carbohydrates: 22g
- Fiber: 2g
- Protein: 14g
- Cholesterol: 45mg
Keywords: turkey cheddar roll ups, pinwheels, lunch meal prep, kid friendly, party appetizer, no cook